> For the complete documentation index, see [llms.txt](https://jollyproxy.gitbook.io/docs/llms.txt). Markdown versions of documentation pages are available by appending `.md` to page URLs; this page is available as [Markdown](https://jollyproxy.gitbook.io/docs/proxy-configuration/antidetect-browser-configuration-guide/vmlogin.md).
# VMLogin
{% hint style="danger" icon="exclamation" %}
**Usage Notice:** All JollyProxy proxy products must be used in an overseas network environment. Please ensure that you have configured the corresponding overseas network environment yourself.
{% endhint %}
This tutorial will explain how to configure a [**JollyProxy**](https://www.JollyProxy.com/zh-cn/) proxy in the **VMLogin antidetect browser** to achieve a secure, isolated multi-account operation environment.
> **Tip**: Residential proxies are used in the same way as static residential proxies.
### 1. Download and Install the VMLogin Client
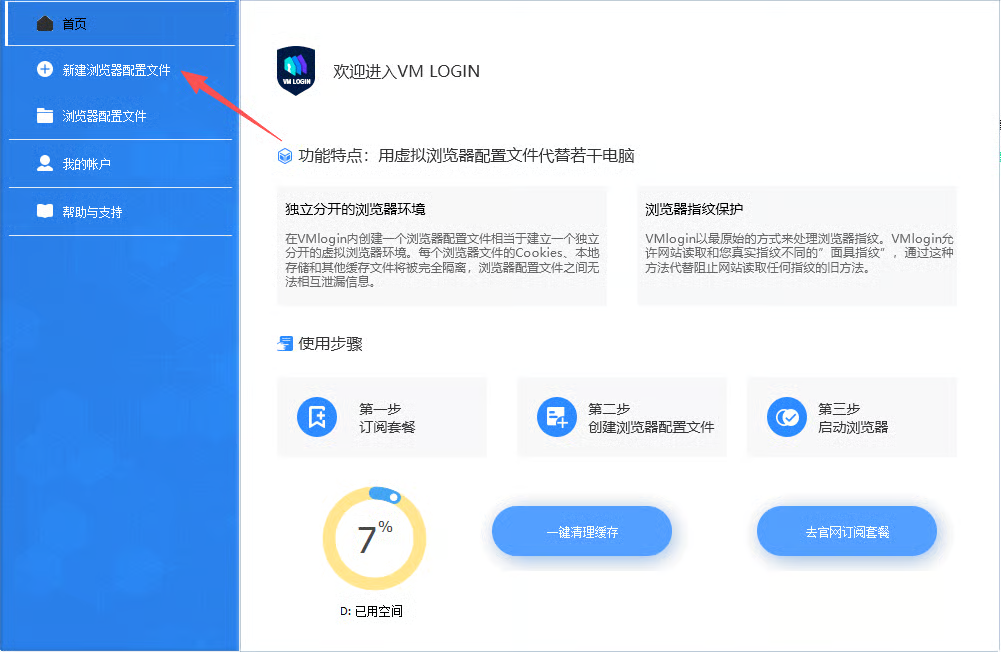
Visit the **VMLogin official website**, register an account, download the client, and launch the software after installation is complete.
### 2. Create a New Browser Profile
After opening the VMLogin client, click the **New Browser Profile** button on the main interface to enter the configuration page.
### 3. Configure Basic Browser Information
In the pop-up configuration window, fill in the basic information for the browser profile, such as name, notes, group, etc.
### 4. Enable the Proxy and Select the Proxy Type
On the configuration page, find the **Proxy Server** section, check **Enable Proxy Server**, and then select the appropriate proxy protocol.
> **Please Note**: JollyProxy currently supports two proxy protocols: **HTTP** and **SOCKS5**. Please choose according to your actual needs.
### 5. Obtain JollyProxy Proxy Information
Log in to the [JollyProxy platform](https://www.jollyproxy.com/), go to the **Static Residential Proxy** page, and click **IP List** to view and copy your proxy information (server address, port, username, password).
### 6. Fill in the Proxy Information
Enter the copied proxy information into the corresponding input fields in the VMLogin proxy settings.
### 7. Test Proxy Connectivity
After filling in the information, click the **Test Proxy** button, and the system will automatically check the connectivity of the proxy IP. If **Proxy Test Successful** is displayed, the configuration is correct.
### 8. Launch the Browser Environment
Return to the profile list, find the profile you just created, and double-click the entry or click the **Start** button to open the browser.
### 9. Verify the Proxy IP
In the opened browser, visit an IP detection website and confirm that the displayed IP address matches the proxy IP provided by JollyProxy.
> You have now successfully configured the JollyProxy proxy in the VMLogin antidetect browser and can begin secure, isolated multi-account operations.
---
# Agent Instructions
This documentation is published with GitBook. GitBook is the documentation platform designed so that both humans and AI agents can read, navigate, and reason over technical content effectively. Learn more at gitbook.com.
## Querying This Documentation
If you need additional information that is not directly available in this page, you can query the documentation by asking a question.
Perform an HTTP GET request on the following URL with the `ask` and `goal` query parameters:
```
GET https://jollyproxy.gitbook.io/docs/proxy-configuration/antidetect-browser-configuration-guide/vmlogin.md?ask=&goal=
```
`ask` is the immediate question: it should be specific, self-contained, and written in natural language.
`goal` is what the user is ultimately trying to achieve, the reason they need the answer. Sharing it helps GitBook give you a better, more relevant answer. A goal is most helpful when it describes the outcome the user wants rather than restating the question. For example, with `ask=how do I create an API token`, a goal like `automate deployments from our CI pipeline` lets GitBook tailor the answer to that use case.
The response will contain a direct answer to the question and relevant excerpts and sources from the documentation.
Use this mechanism when the answer is not explicitly present in the current page, you need clarification or additional context, or you want to retrieve related documentation sections.